How To Make Yourself Into A Cartoon
How To Make Yourself Into A Cartoon - Have you ever looked at a cartoon and thought, "Wow, that's so cool! I wish I could turn myself into a cartoon too!" Well, you're in luck my friend, because with the power of technology and a few simple tips, you can cartoonize yourself and impress your friends and followers. In this article, we'll show you some of the best ways to cartoonize a photo, how to turn yourself into a cartoon effect, and even make a cartoon of yourself. So, buckle up, get ready to unleash your creativity, and let's dive into the world of cartoonizing!
Turn Yourself into a Cartoon Effect with Photoshop
Step 1: Choose your Photo
The first thing you need to do is choose the photo you want to turn into a cartoon. It can be a selfie, a portrait, or any other photo that you want to experiment with. Keep in mind that your final output will depend on the quality of the original photo, so choose a clear and high-resolution image.
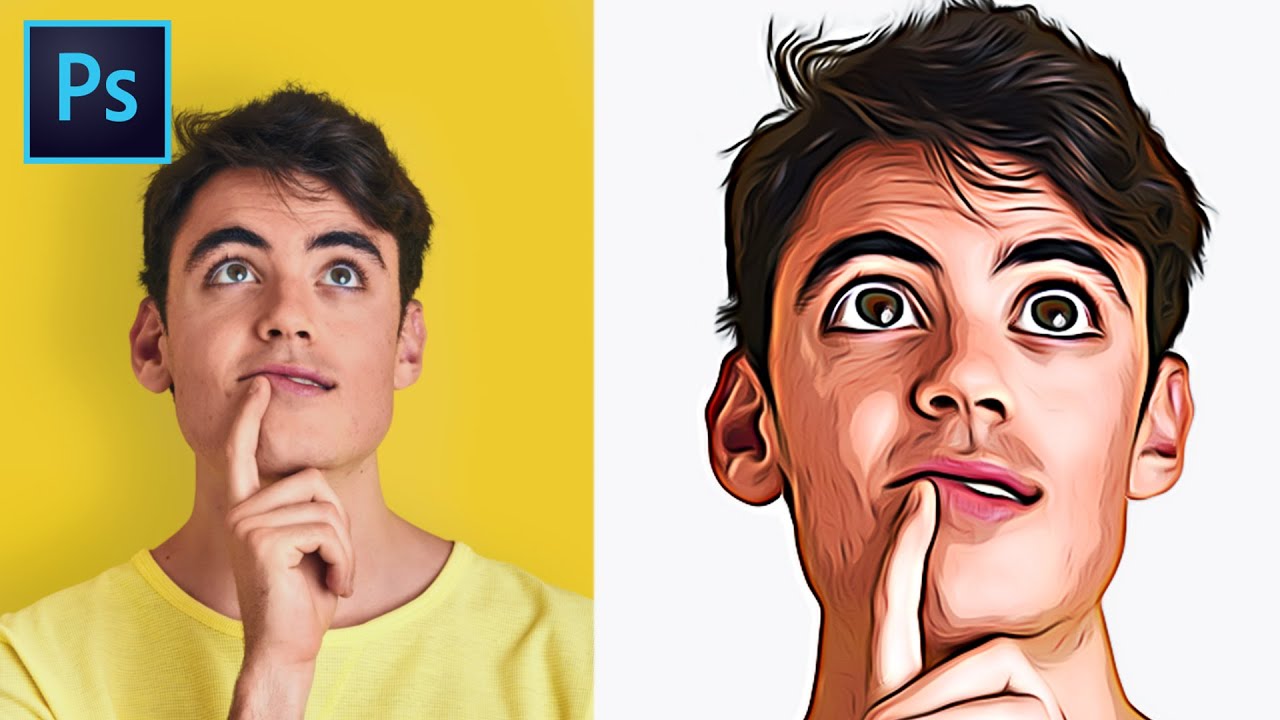
Step 2: Open your Image in Photoshop
Next, you need to open your image in Adobe Photoshop. There are a few ways to do this, but the easiest way is to go to "File" > "Open" and select your image.
Step 3: Duplicate the Original Layer
Once you have your image open, you need to duplicate the original layer. Right-click on the layer and select "Duplicate Layer." You can also use the shortcut "Ctrl+J" (Windows) or "Cmd+J" (Mac) to do this.
Step 4: Turn the Duplicate Layer into a Smart Object
The next thing you need to do is turn the duplicate layer into a smart object. Right-click on the layer and select "Convert to Smart Object." This will allow you to apply filters and effects non-destructively, meaning you can always go back and edit the layer later on.
Step 5: Apply the Poster Edges Filter
Once you have the smart object layer, you can start applying filters and effects to achieve the cartoon effect. Go to "Filter" > "Filter Gallery" and select the "Poster Edges" filter. Play around with the settings until you achieve the desired effect.
Step 6: Apply the Cutout Filter
Next, apply the "Cutout" filter by going to "Filter" > "Filter Gallery" again. This filter will help you achieve the bold, simplified look of a cartoon. Adjust the settings until you're happy with the result.
Step 7: Add Color to Your Cartoon
Finally, you can add color to your cartoon by creating a new layer and painting over the different areas of your image. You can use the "Paint Bucket" tool to fill in large areas and the "Brush" tool to add smaller details. Play around with the colors until you achieve the result you want.
Make a Cartoon of Yourself with Osoq.com
Step 1: Visit Osoq.com
If you don't have Photoshop or you simply want an easier way to cartoonize yourself, you can use Osoq.com to make a cartoon of yourself. Go to Osoq.com and click on "Cartoon Characters" > "Make a Cartoon of Yourself."

Step 2: Upload Your Photo
Next, you need to upload your photo by clicking on the "Choose File" button. Make sure your photo is clear and high-resolution.
Step 3: Customize Your Cartoon
Osoq.com offers a variety of customization options to help you create a cartoon that's truly unique. You can change the background, add accessories, and adjust the colors to your liking.
Step 4: Download Your Cartoon
Once you're happy with your cartoon, you can download it by clicking on the "Download" button. You can then share your cartoon on social media or use it as your profile picture.
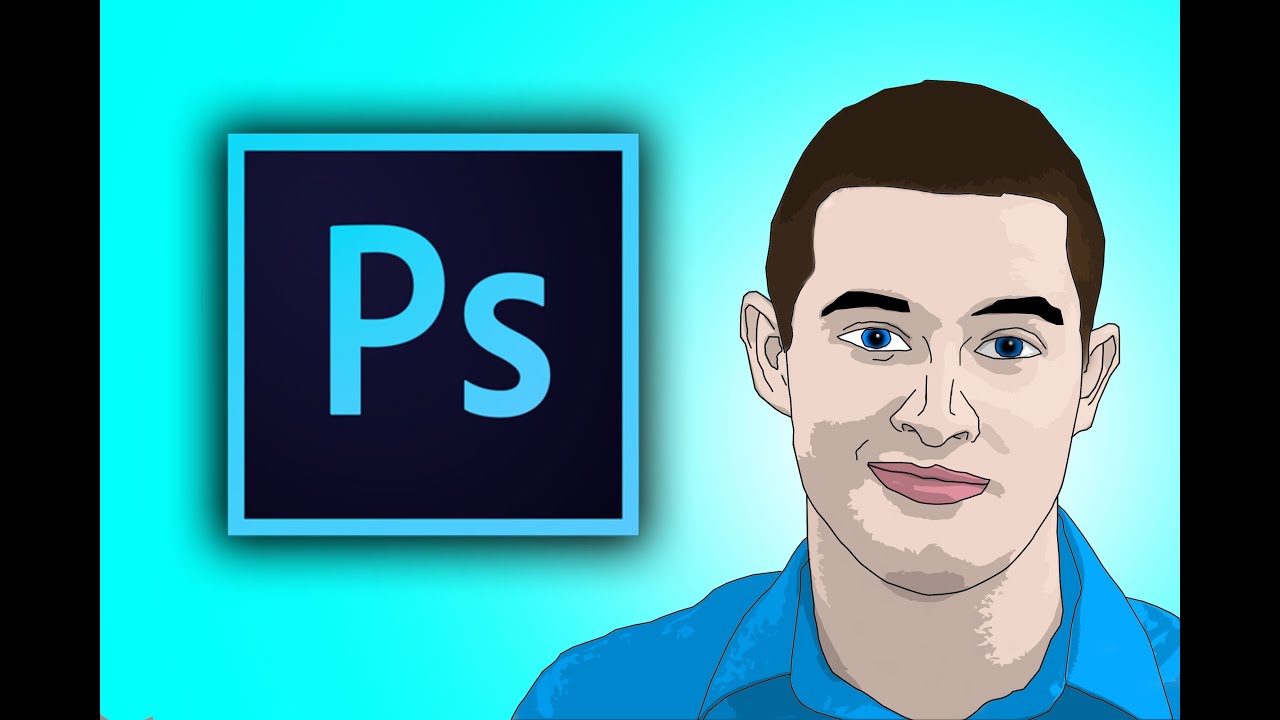
Cartoonize a Photo in Illustrator
Step 1: Open Your Image in Illustrator
The first thing you need to do is open your image in Adobe Illustrator. Go to "File" > "Place" and select your image.
Step 2: Trace Your Image
Next, you need to trace your image using the "Image Trace" tool. Go to "Object" > "Image Trace" and select the "High Fidelity Photo" preset. This will help you achieve a more detailed and accurate vector version of your image.
Step 3: Expand Your Vector Image
Once you have your image traced, you need to expand it by going to "Object" > "Image Trace" > "Expand." This will convert your traced image into a vector-based artwork that you can edit and customize.
Step 4: Simplify and Colorize Your Vector Image
Finally, you can simplify and colorize your vector image by using the "Simplify" and "Live Paint" tools in Illustrator. The "Simplify" tool will help you reduce the number of anchor points in your artwork, while the "Live Paint" tool will allow you to add and manipulate colors easily. Play around with these tools until you achieve the result you want.
Cartoonizing Tips and Ideas
If you want to take your cartoonizing skills to the next level, here are some tips and ideas to keep in mind:
- Experiment with different filters and effects to achieve different styles of cartoons.
- Use bright and bold colors to make your cartoon stand out.
- Try to simplify your image as much as possible, focusing on the essential details and features.
- Add accessories and props to your cartoon to make it more interesting and unique.
- Have fun and don't be afraid to get creative!
With these tips and ideas, you can create amazing cartoons that will impress everyone. Whether you choose to use Photoshop, Illustrator, or Osoq.com, remember that the key to a great cartoon is to have fun and let your creativity run wild!
Read more articles about How To Make Yourself Into A Cartoon


Komentar
Posting Komentar